
KitchenAid Built-In Refrigerator Not Freezing: Finding and Replacing a Leaking Evaporator Coil
The freezer on a built-in KitchenAid in Los Angeles stopped freezing. The refrigerant had leaked out through a worn spot on the aluminum evaporator, so we replaced the coil.
In this guide
The call: freezer stopped freezing
A homeowner in Los Angeles called about a built-in KitchenAid refrigerator. The freezer side had stopped freezing, and the fresh food side was on its way to following it. On a built-in like this the sealed system is the expensive part, so the first job is to figure out whether it’s a leak, a restriction or a compressor before touching anything.
Finding low pressure
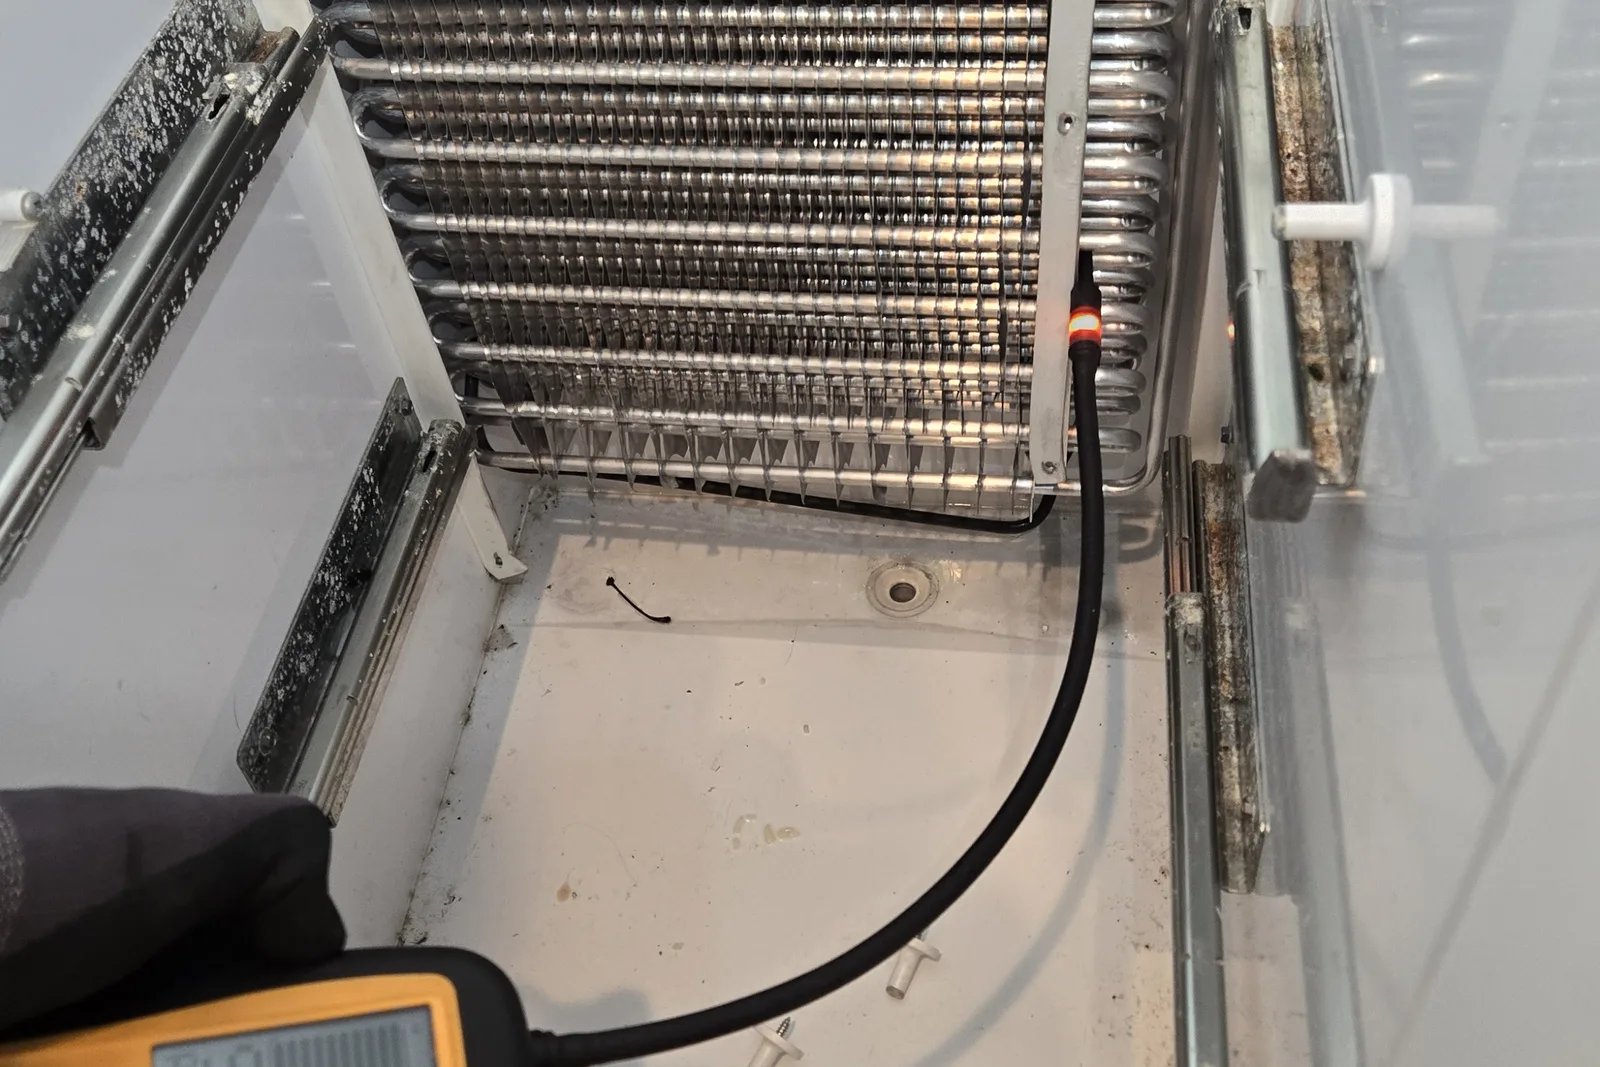
I tapped into the system with a piercing valve and the pressure was low. That points at a leak, but low pressure alone doesn’t tell you where. To find it, I added nitrogen to bring the system up to pressure and then went over it with an electronic leak detector.
Ruling out the easy spot first
The bottom condensate loop is a common leak point on these, and it’s the easiest to reach, so I checked it first. Completely dry. No signal from the detector anywhere down there.
The evaporator
With the detector dialed down to its lowest sensitivity so it wouldn’t chase every trace, I moved up into the freezer and along the evaporator coil. On the bottom bend the detector went off hard. Up close, with the nitrogen pushing on it, you could actually hear the hiss. That is not a pinhole. That is a real hole under pressure.
The cause was mechanical. The aluminum tubing of the coil had been sitting right against the defrost heating element. Years of expansion, contraction and vibration rubbed the two together until the tubing wore through, and once it did, the refrigerant was gone.
Why we replaced the coil instead of patching it
This evaporator is all aluminum. Repairing aluminum tubing is possible, but it’s a fussy job with a real chance of a weak joint that opens up again months later, and the worn spot was right on a bend. The evaporator for this model was available to order, so the reliable answer was a new OEM coil. That way the customer gets a clean part with no repair joint in it.
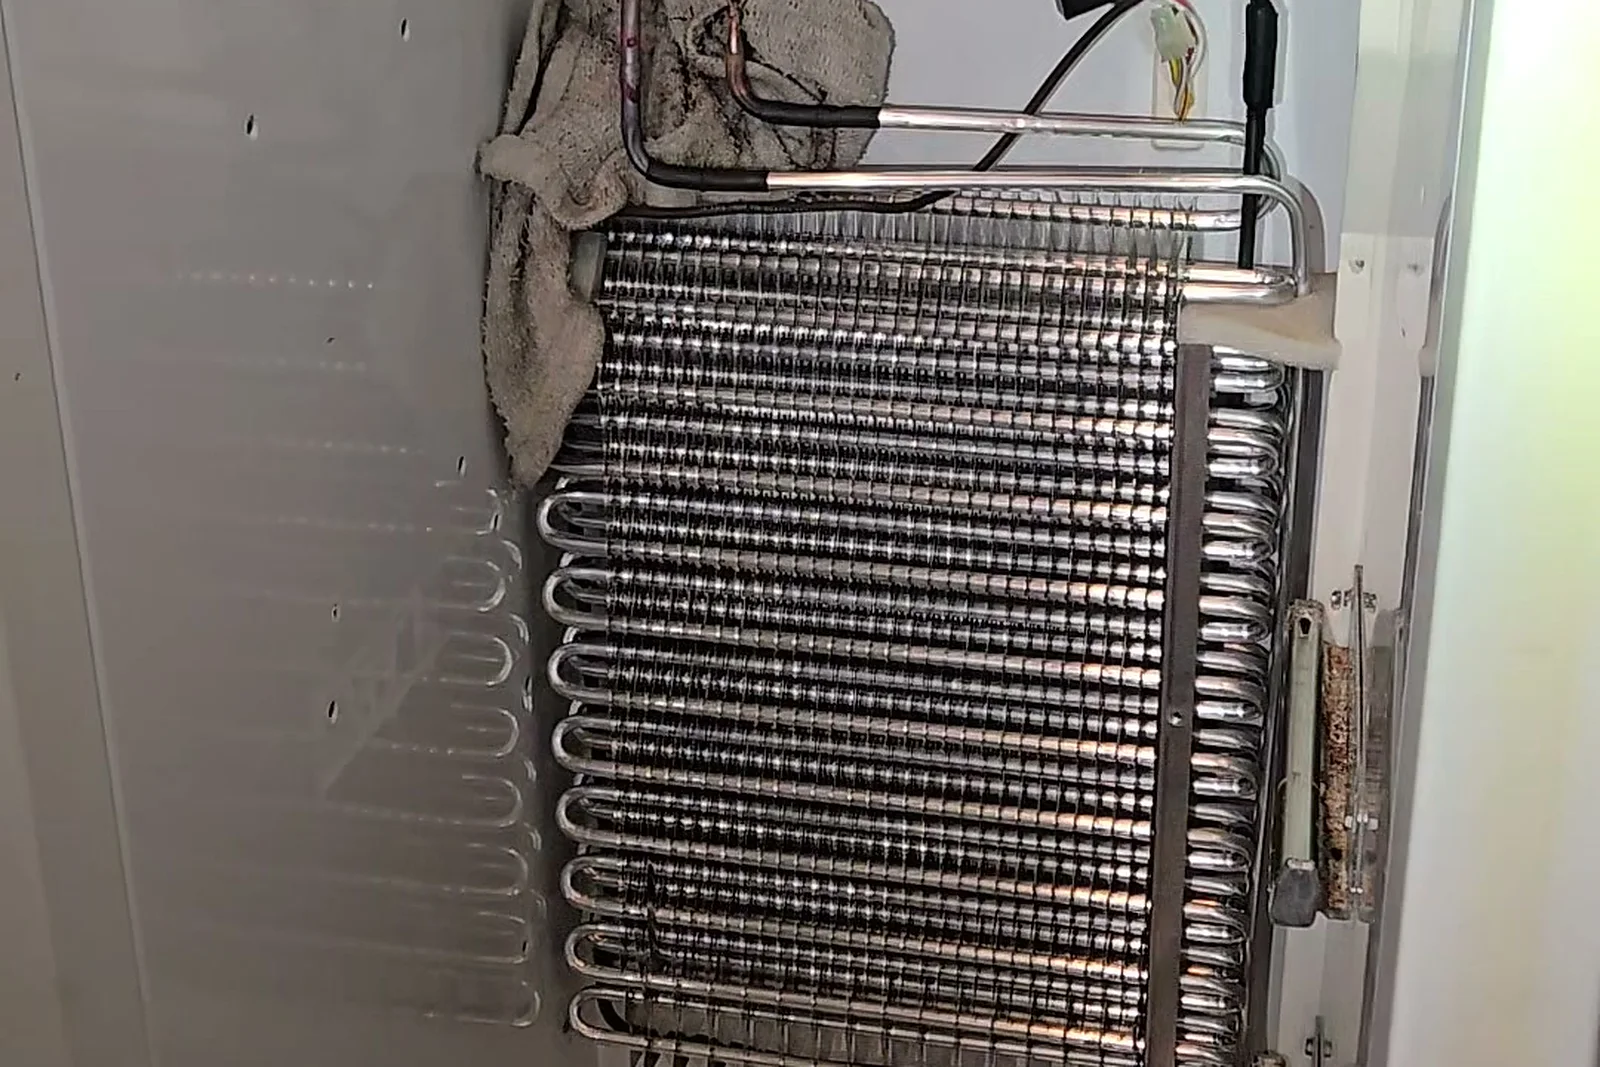
I also replaced the filter drier. Any time a sealed system is opened, the drier gets replaced, because the old one has been exposed to moisture and air and won’t protect the new part.
Flushing the capillary tube
One thing that often gets skipped: when the refrigerant leaks out, oil can end up in the capillary tube, and a partly blocked cap tube will make a brand new coil underperform. I use a tool I built for this. It’s a fitting with a hole drilled through it, threaded into an old compressor fitting that’s also been drilled out. Thread the two together and they clamp down on the capillary tube, so I can push flush and then high-pressure gas straight through it. When it blows clear, I know there’s no oil restriction waiting to cause trouble before I braze the new coil in.
Pressure test, vacuum, charge
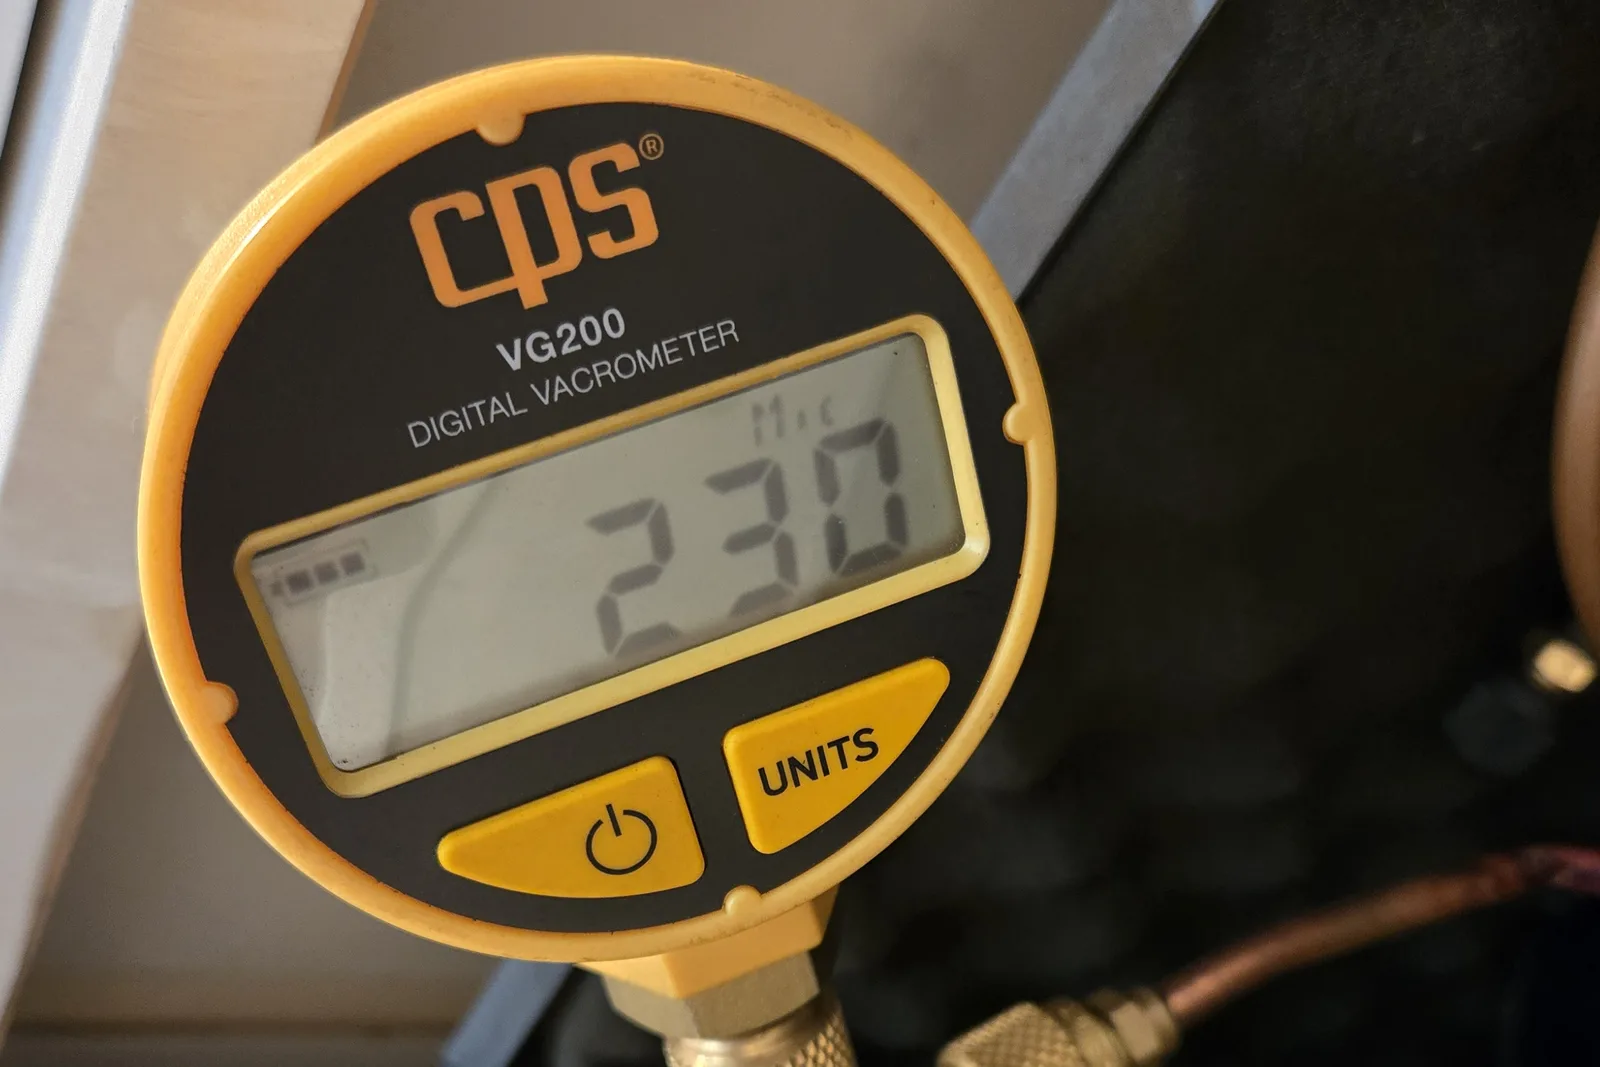
With the new evaporator brazed in, I pressure-tested the whole system with nitrogen and it held. Then I pulled a deep vacuum, down to 230 microns, and let it sit. It held there for over fifteen minutes without creeping, which means the system is tight and dry. After that, I charged it by weight to the factory specification.
Back to freezing
The freezer was already dropping temperature before I packed up, showing 56.4°F on the way down. A full pull-down on a built-in this size takes up to 24 hours, so the customer was told not to load it up until the next day.
Refrigerator repair in Los Angeles
Epic Star Repair handles sealed-system work on built-in and standard refrigerators across the Westside, Hollywood and the San Fernando Valley, including KitchenAid, Sub-Zero, Viking and LG. CA BEAR registered (#A 50636). We quote a flat rate upfront, and the $85 service call is credited toward the repair. If your freezer has stopped freezing, call before the fresh food side warms up too.
FAQ
Why did my KitchenAid built-in refrigerator stop freezing?
The common causes are a refrigerant leak, a failed compressor, a restriction in the sealed system, or a defrost problem that ices over the coil. Low pressure at a piercing valve points to a leak, which is what we found here.
Where do refrigerator evaporator coils usually leak?
On many built-ins the aluminum evaporator tubing rubs against the defrost heater or a bracket until it wears through, usually on a bend. The bottom condensate loop is another common spot, which is why we check it first.
Can an aluminum evaporator coil be repaired instead of replaced?
It can be attempted, but repairs on thin aluminum tubing are unreliable, especially on a bend. When the OEM evaporator is available, replacing the coil gives a result that lasts.
Why replace the filter drier when replacing the evaporator?
Once the sealed system has been opened, the old drier has absorbed moisture and air. A new drier protects the fresh refrigerant and the compressor. It's standard practice on every sealed-system repair.
How long does it take for the freezer to get cold after the repair?
The temperature starts dropping within minutes, but a full pull-down on a large built-in can take up to 24 hours. Give it a day before loading it with food.
Do you repair KitchenAid built-in refrigerators in Los Angeles?
Yes. We do sealed-system and compressor work on built-in refrigerators across the Westside, Hollywood and the San Fernando Valley. The $85 service call is credited toward the repair.
Got an appliance that needs fixing? We cover LA and the Valley.
Call (213) 205-2055 or text a photo of your appliance.